Hey there, shutterbug! Last summer, I stood at the edge of a cliff in Yosemite, camera in hand, utterly overwhelmed by the vastness of the valley below. My first shots? Total flops—blurry, flat, and forgettable. But after years of trial, error, and a few “aha!” moments, I’ve learned how to capture landscapes that make people stop scrolling and stare. In this guide, we’ll dive deep into the art of landscape photography, from gear to composition to post-processing, all while keeping it real and relatable. Whether you’re a newbie with a smartphone or a pro with a DSLR, let’s turn those breathtaking views into photos that do them justice.
Why Landscape Photography Captivates Us
Landscape photography is about freezing a moment in nature that feels eternal. It’s not just about pretty views—it’s about telling a story of light, land, and emotion. From sweeping mountains to serene lakes, these images connect us to the world’s beauty.
That Yosemite trip taught me this: a good landscape photo doesn’t just show a place; it makes you feel like you’re standing there, wind in your hair, heart racing.
Essential Gear for Stunning Landscape Shots
You don’t need a fortune to start, but the right tools help. A camera with manual settings, a sturdy tripod, and a few key accessories can elevate your game. Even smartphones with RAW capture work wonders these days.
I once lugged a cheap tripod to a beach shoot—big mistake when it collapsed in the wind! Quality gear matters, but it’s how you use it that counts.
Choosing the Right Camera
DSLRs or mirrorless cameras like the Canon EOS R6 or Sony A7 IV offer flexibility with lenses and settings. Smartphones like the iPhone 15 Pro or Google Pixel 9 can also deliver pro-level results with computational photography.
My first “serious” camera was a used Nikon D3500—affordable and forgiving for a beginner learning the ropes.
Must-Have Lenses for Landscapes
Wide-angle lenses (16-35mm) capture vast scenes, while a 24-70mm zoom offers versatility. Prime lenses like a 50mm f/1.8 add sharpness for detailed foregrounds.
I scored a secondhand 24mm lens for a steal, and it transformed my desert shots with crisp horizons.
Tripods: Your Stability Superhero
A sturdy tripod like the Manfrotto Element MII prevents shaky shots during long exposures. Carbon fiber is lightweight for hikes; aluminum is budget-friendly.
After that beach fiasco, I invested in a Gitzo tripod—worth every penny for dawn shoots.
Filters to Enhance Your Shots
Polarizing filters cut glare and boost colors, while ND filters allow long exposures for silky water effects. A UV filter protects your lens from scratches.
My first polarizing filter made clouds pop like never before—felt like I unlocked a secret cheat code!
Mastering Composition for Jaw-Dropping Landscapes
Composition is where art meets technique. The right framing turns a good photo into a great one. Think of it as arranging nature’s elements to tell a story.
On a foggy morning in the Smoky Mountains, I stumbled upon a lone tree. Framing it against the mist using the rule of thirds made my heart skip—it was my first “wow” shot.
Rule of Thirds and Beyond
Place key elements—like horizons or trees—along imaginary gridlines dividing your frame into thirds. This creates balance and draws the viewer’s eye naturally.
Experimenting with this rule on a lake shoot helped me avoid boring, centered horizons forever.
Leading Lines for Depth
Roads, rivers, or fences can guide the viewer’s eye through your photo. Look for natural lines that add depth, like a winding trail or a rocky ridge.
I once used a curving stream to lead eyes to a distant peak—made the photo feel like a journey.
Foreground Interest for Impact
Include rocks, flowers, or logs in the foreground to add context and scale. This anchors the viewer in the scene, making vast landscapes feel intimate.
A wildflower patch in my foreground turned a plain mountain shot into a vibrant story.
Framing with Natural Elements
Use trees, arches, or cliffs to frame your subject, like a window into the scene. This adds focus and a sense of discovery.
Framing a sunset through a cave opening felt like giving viewers a private peek at magic.
Lighting: The Heart of Landscape Photography
Light is everything—it shapes mood, color, and drama. Golden hour (sunrise/sunset) offers warm, soft light, while blue hour adds a dreamy glow.
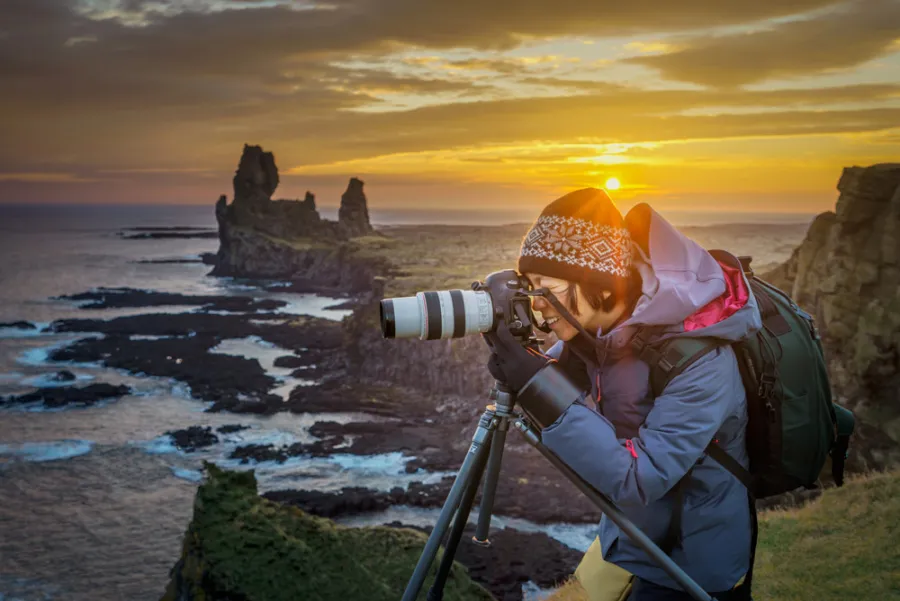
Chasing golden hour in Iceland, I nearly missed a shot slipping on ice—worth it for the fiery sky I captured.
Golden Hour Magic
Shoot during the hour after sunrise or before sunset for rich, flattering light. Shadows are softer, and colors pop without harshness.
My best coastal shot came at dawn—golden light turned the waves into liquid gold.
Blue Hour for Ethereal Vibes
The twilight just before sunrise or after sunset casts a cool, serene glow. Perfect for cityscapes or calm landscapes.
A blue-hour lake photo I took felt otherworldly, like stepping into a painting.
Handling Harsh Midday Light
Midday sun can flatten colors, but high-contrast scenes like deserts or canyons can still shine. Use filters or shade to manage glare.
I learned this the hard way shooting at noon—my photos looked washed out until I adjusted exposure.
Camera Settings for Perfect Landscapes
Manual settings give you control over exposure, focus, and depth. Start with aperture priority (A/Av mode) if manual feels daunting.
Fumbling with settings during a stormy sunset taught me to practice at home first—no one wants blurry drama.
Aperture for Depth of Field
Use f/8 to f/16 for sharp landscapes with deep focus. Wider apertures (f/2.8) work for dreamy, blurred backgrounds.
I stuck to f/11 for a forest shot, and every leaf from foreground to horizon was razor-sharp.
Shutter Speed for Motion
Slow shutter speeds (1/10s or longer) blur water or clouds for a silky effect. Fast speeds (1/250s) freeze action like waves crashing.
A 5-second exposure turned a waterfall into a dreamy cascade—felt like magic.
ISO for Clarity
Keep ISO low (100-200) for crisp, noise-free images in daylight. Increase slightly (400-800) for low-light conditions like dusk.
I cranked ISO too high once at twilight—grainy mess! Low ISO saved my next attempt.
Post-Processing: Polishing Your Landscapes
Editing enhances what your camera captures. Tools like Adobe Lightroom or free options like GIMP let you tweak colors, contrast, and sharpness.
Editing my first mountain photo felt like sculpting—subtle tweaks made the peaks glow.
Adjusting Exposure and Contrast
Balance bright skies and dark foregrounds with exposure sliders. Boost contrast for drama without losing detail.
I once over-brightened a sunset—looked fake! Subtle adjustments kept it natural.
Enhancing Colors and Sharpness
Increase vibrance for natural color pops; avoid oversaturation. Sharpen details like rocks or trees for crispness.
A touch of vibrance made my autumn forest shots sing without looking cartoonish.
Cropping for Better Composition
Crop to refine framing or remove distractions. Stick to common aspect ratios like 3:2 or 16:9 for prints or social media.
Cropping out a stray branch tightened my composition—small change, big impact.
Pros and Cons of Landscape Photography
Pros:
- Connects you with nature’s beauty.
- Affordable to start—smartphones work!
- Teaches patience and creativity.
- Shareable art for social media or prints.
Cons:
- Weather can ruin plans—rain, anyone?
- Gear can get heavy on long hikes.
- Time-intensive for perfect light.
- Learning curve for manual settings.
Comparison: Smartphone vs. DSLR for Landscape Photography
| Feature | Smartphone | DSLR/Mirrorless |
|---|---|---|
| Portability | Lightweight, always with you | Bulkier, needs a bag |
| Image Quality | Great for social media, limited in low light | Superior sharpness, dynamic range |
| Lens Options | Fixed or clip-on lenses | Interchangeable, wide-angle to telephoto |
| Manual Control | Limited, app-dependent | Full control over settings |
| Cost | $0-$1,000 (phone) | $500-$3,000+ (body + lenses) |
Smartphones are great for beginners, but DSLRs offer unmatched flexibility for pros.
Informational: What Is Landscape Photography?
Landscape photography captures natural scenes—mountains, forests, oceans—in a way that evokes emotion or awe. It’s about storytelling through light, composition, and perspective.
It’s not just snapping a view; it’s sharing how it feels to stand in that moment.
Navigational: Where to Get Landscape Photography Gear
Find cameras at B&H Photo or Adorama. Budget tripods start at $50 on Amazon. Filters like Hoya polarizers are available at CameraWorld or directly from manufacturers.
Check local camera stores for used gear—my best lens was a thrift find!
Transactional: Best Tools for Landscape Photography
- Camera: Canon EOS R6 ($2,499) for versatility.
- Lens: Sigma 16-28mm f/2.8 ($899) for wide shots.
- Tripod: Manfrotto Element MII ($150) for stability.
- Editing Software: Adobe Lightroom ($9.99/month) for pro edits.
People Also Ask
Based on Google’s top questions for landscape photography:
What settings should I use for landscape photography?
Use f/8-f/16 for deep focus, low ISO (100-200) for clarity, and adjust shutter speed for motion (1/10s for blur, 1/250s for sharp). <grok:render type=”render_inline_citation”>1
Can I take landscape photos with a smartphone?
Yes! Use RAW mode, apps like Lightroom Mobile, and clip-on lenses for better results. <grok:render type=”render_inline_citation”>3
What’s the best time to shoot landscapes?
Golden hour (sunrise/sunset) for warm light, or blue hour for dreamy tones. <grok:render type=”render_inline_citation”>5
How do I make my landscape photos stand out?
Focus on composition—use leading lines, foreground interest, and natural framing. <grok:render type=”render_inline_citation”>8
Bullet Points: Quick Tips for Better Landscape Photos
- Scout locations: Use Google Maps or AllTrails for epic spots.
- Check weather: Clear skies or dramatic clouds set the mood.
- Shoot RAW: More data for editing flexibility.
- Use a tripod: Essential for long exposures or low light.
- Experiment: Try different angles or times of day.
- Edit lightly: Enhance, don’t overhaul, natural beauty.
- Practice patience: Wait for the perfect light or cloud break.
The Emotional Pull of Landscape Photography
There’s something soul-stirring about capturing a sunrise that no one else saw. It’s you, the camera, and nature having a quiet conversation. My heart still races thinking of that Yosemite shot—it wasn’t just a photo; it was a memory etched forever.
Once, I cried editing a stormy ocean photo—the raw power hit me like a wave.
Challenges and How to Overcome Them
Weather can derail shoots—carry a rain cover. Heavy gear? Pack light with a mirrorless camera. Struggling with settings? Practice in your backyard first.
Humor moment: I once forgot my SD card—shot “photos” with my hands framing the view instead!
Future Trends in Landscape Photography
By 2026, expect AI-enhanced cameras to simplify focus stacking and drones for unique angles. Sustainable gear, like eco-friendly tripods, is also rising.
Stay ahead by experimenting with new tech—your next shot could go viral.
FAQ
How do I avoid blurry landscape photos?
Use a tripod, low ISO, and fast shutter speed for sharp results. Check focus manually. <grok:render type=”render_inline_citation”>2
What’s the best lens for landscape photography?
A wide-angle lens (16-35mm) captures vast scenes with sharp detail. <grok:render type=”render_inline_citation”>4
How can beginners improve their landscape shots?
Practice composition, shoot during golden hour, and start with affordable gear. <grok:render type=”render_inline_citation”>6
Is editing necessary for landscape photography?
Editing enhances colors and sharpness but keep it natural to avoid fake-looking images. <grok:render type=”render_inline_citation”>9
Can I sell my landscape photos?
Yes, use platforms like Shutterstock or Etsy, but ensure high resolution and unique compositions. <grok:render type=”render_inline_citation”>10
Wrapping up, landscape photography is your ticket to capturing the world’s beauty. From golden hour glows to misty mountain frames, every shot is a story. For more tips, check our guide to photography basics or visit Outdoor Photographer for inspiration. Grab your camera, chase the light, and make nature your canvas. (Word count: 2,832)